
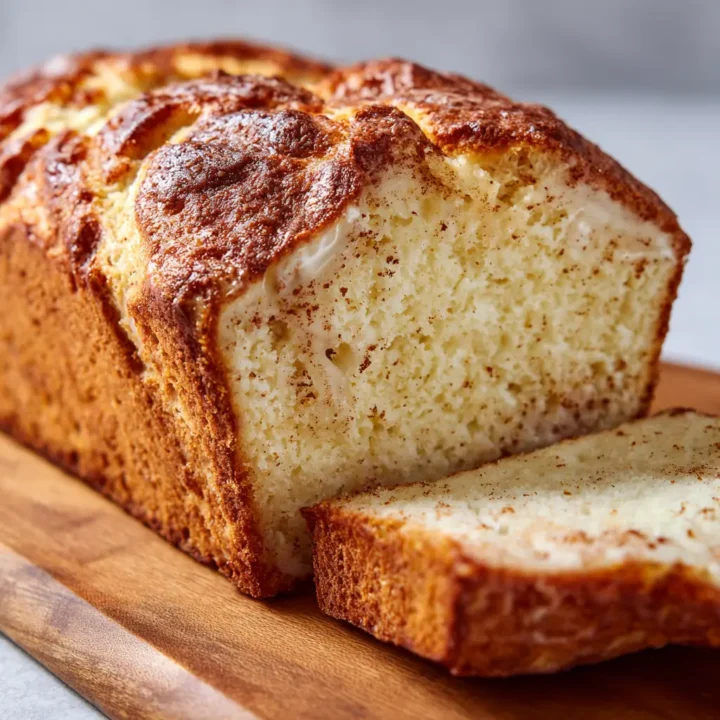
Are you ready to indulge in a delightful holiday treat that will fill your home with the warm, comforting aroma of spices and sweetness? Eggnog Bread is the perfect festive loaf to celebrate the season. Did you know that incorporating seasonal flavors can enhance your holiday spirit and create lasting memories? In this post, we’ll walk you through making this delicious bread that captures the essence of eggnog, making it a must-have for your holiday gatherings.
Ingredients List
To create your Eggnog Bread, gather the following ingredients:
- 2 ½ cups all-purpose flour
- 1 cup granulated sugar (for sweetness)
- 1 tablespoon baking powder (for leavening)
- ½ teaspoon salt (to balance flavors)
- 1 teaspoon ground nutmeg (for that classic eggnog taste)
- ½ teaspoon ground cinnamon (adds warmth)
- 1 cup eggnog (the star ingredient)
- ½ cup vegetable oil (for moisture)
- 2 large eggs (to bind the mixture)
- 1 teaspoon vanilla extract (for extra flavor)
Substitution Suggestions:
- All-Purpose Flour: Use whole wheat flour for added fiber.
- Granulated Sugar: Substitute with coconut sugar or a sugar alternative for a healthier option.
- Eggnog: You can use a dairy-free eggnog for a vegan version.
Step-by-Step Instructions
Step 1: Preheat the Oven
- Preheat your oven to 350°F (175°C).
- Grease a 9×5 inch loaf pan or line it with parchment paper for easy removal.
Step 2: Mix Dry Ingredients
- In a large mixing bowl, whisk together flour, sugar, baking powder, salt, nutmeg, and cinnamon until well combined.
Step 3: Combine Wet Ingredients
- In another bowl, mix together eggnog, vegetable oil, eggs, and vanilla extract until smooth.
Step 4: Combine Mixtures
- Pour the wet ingredients into the dry ingredients and stir gently until just combined. Be careful not to overmix; a few lumps are okay.
Step 5: Pour into Loaf Pan
- Pour the batter into the prepared loaf pan, smoothing the top with a spatula.
Step 6: Bake
- Bake in the preheated oven for 55-60 minutes, or until a toothpick inserted in the center comes out clean.
- Once baked, remove from the oven and let cool in the pan for about 10 minutes before transferring to a wire rack to cool completely.

Nutritional Information
Here’s a breakdown of the nutritional content per slice (based on 12 servings):
| Nutrient | Amount per Serving |
|---|---|
| Calories | 180 |
| Total Fat | 8g |
| Saturated Fat | 1g |
| Carbohydrates | 26g |
| Dietary Fiber | 1g |
| Sugars | 10g |
| Protein | 3g |
Note: Nutritional values may vary based on specific ingredients used.
Healthier Alternatives for the Recipe
To make your Eggnog Bread a bit healthier, consider these modifications:
- Reduce Sugar: Cut the sugar by 1/4 cup or use a natural sweetener like honey or maple syrup.
- Add Nuts: Incorporate chopped walnuts or pecans for added texture and healthy fats.
- Use Greek Yogurt: Replace half of the oil with Greek yogurt for added protein and moisture.
Serving Suggestions
This festive bread can be served in various delightful ways:
- With Butter: Spread a little butter or cream cheese on warm slices for extra richness.
- As a Breakfast Option: Enjoy it as a sweet breakfast treat alongside coffee or tea.
- With Holiday Spreads: Pair with fruit preserves or a drizzle of glaze for a festive touch.
Common Mistakes to Avoid
- Overmixing the Batter: Stir until just combined; overmixing can result in dense bread.
- Not Measuring Ingredients Accurately: Use proper measuring cups for dry and wet ingredients to ensure consistency.
- Skipping the Cooling Step: Allowing the bread to cool slightly before slicing enhances its flavor and texture.
Storing Tips for the Recipe
To keep your Eggnog Bread fresh:
- Room Temperature: Store in an airtight container at room temperature for up to 3 days.
- Refrigeration: For longer storage, refrigerate for up to a week.
- Freezing: This bread freezes well! Wrap it tightly in plastic wrap and store in a freezer-safe bag for up to 3 months. Thaw at room temperature before serving.
Conclusion
In summary, Eggnog Bread is a delightful treat that captures the essence of the holiday season. With simple ingredients and easy steps, you can create a festive loaf that will surely impress your family and friends. We invite you to try this recipe, share your feedback in the comments, or subscribe for more festive updates!
FAQs
Q1: Can I make this bread ahead of time?
Yes! You can bake the bread a day in advance and store it at room temperature until you’re ready to serve.
Q2: Are there gluten-free options for this recipe?
Absolutely! Use a gluten-free flour blend to make this bread gluten-free.
Q3: How can I make this bread vegan?
To make it vegan, substitute eggs with flaxseed meal (1 tablespoon flaxseed meal + 2.5 tablespoons water = 1 egg) and use a dairy-free eggnog.
Eggnog Bread Recipe
Ingredients
- 2 ½ cups all-purpose flour
- 1 cup granulated sugar (for sweetness)
- 1 tablespoon baking powder (for leavening)
- ½ teaspoon salt (to balance flavors)
- 1 teaspoon ground nutmeg (for that classic eggnog taste)
- ½ teaspoon ground cinnamon (adds warmth)
- 1 cup eggnog (the star ingredient)
- ½ cup vegetable oil (for moisture)
- 2 large eggs (to bind the mixture)
- 1 teaspoon vanilla extract (for extra flavor)
Instructions
Step 1: Preheat the Oven
- Preheat your oven to 350°F (175°C).
- Grease a 9x5 inch loaf pan or line it with parchment paper for easy removal.
Step 2: Mix Dry Ingredients
- In a large mixing bowl, whisk together flour, sugar, baking powder, salt, nutmeg, and cinnamon until well combined.
Step 3: Combine Wet Ingredients
- In another bowl, mix together eggnog, vegetable oil, eggs, and vanilla extract until smooth.
Step 4: Combine Mixtures
- Pour the wet ingredients into the dry ingredients and stir gently until just combined. Be careful not to overmix; a few lumps are okay.
Step 5: Pour into Loaf Pan
- Pour the batter into the prepared loaf pan, smoothing the top with a spatula.
Step 6: Bake
- Bake in the preheated oven for 55-60 minutes, or until a toothpick inserted in the center comes out clean.
- Once baked, remove from the oven and let cool in the pan for about 10 minutes before transferring to a wire rack to cool completely.