Have you ever craved a cookie that combines the nostalgic crunch of Rice Krispies with the rich, gooey goodness of chocolate chips? If so, you’re not alone! Recent surveys show that over 70% of cookie lovers seek unique textures and flavors in their baking adventures. Enter the Crunchy Chocolate Chip Rice Krispie Cookies—a delightful fusion that promises to satisfy both your sweet tooth and your craving for crunch. In this post, we’ll explore how to create these irresistible cookies, packed with flavor and texture, all while being easy to prepare.
Ingredients List
Creating Crunchy Chocolate Chip Rice Krispie Cookies is simple and requires just a few key ingredients. Here’s what you’ll need:
Ingredients:
- 1 cup unsalted butter, softened
Brings richness and moisture to your cookies. - 1 cup brown sugar, packed
Adds a deep caramel flavor and chewiness. - 1/2 cup granulated sugar
Balances the sweetness and enhances texture. - 2 large eggs
Provides structure and helps bind ingredients together. - 1 teaspoon vanilla extract
Infuses a warm, aromatic flavor. - 2 cups all-purpose flour
The base for your cookie dough. - 1 teaspoon baking soda
Helps cookies rise and become fluffy. - 1/2 teaspoon salt
Enhances the overall flavor profile. - 2 cups Rice Krispies cereal
Adds that signature crunch and texture. - 1 cup semi-sweet chocolate chips
Melts beautifully and provides a rich chocolate flavor.
Suggested Substitutions:
- Butter: Use coconut oil for a dairy-free option.
- Brown Sugar: Substitute with coconut sugar for a lower glycemic index.
- Chocolate Chips: Dark chocolate or white chocolate chips can be used for variety.
Step-by-Step Instructions
Step 1: Preheat the Oven
Preheat your oven to 350°F (175°C). This ensures your cookies bake evenly and achieve the perfect texture.
Step 2: Cream the Butter and Sugars
In a large mixing bowl, combine 1 cup softened butter, 1 cup brown sugar, and 1/2 cup granulated sugar. Using an electric mixer, cream the mixture until it’s light and fluffy, about 2-3 minutes. This step is crucial for achieving a soft cookie texture.
Step 3: Add Eggs and Vanilla
Beat in 2 large eggs and 1 teaspoon vanilla extract until well combined. Make sure to scrape down the sides of the bowl to incorporate all the ingredients.
Step 4: Combine Dry Ingredients
In a separate bowl, whisk together 2 cups all-purpose flour, 1 teaspoon baking soda, and 1/2 teaspoon salt. Gradually add this dry mixture to the wet ingredients, mixing until just combined. Avoid overmixing to keep your cookies tender.
Step 5: Fold in Rice Krispies and Chocolate Chips
Gently fold in 2 cups Rice Krispies cereal and 1 cup semi-sweet chocolate chips using a spatula. This step adds the signature crunch and delicious chocolate flavor to your cookies.
Step 6: Scoop and Bake
Using a cookie scoop or tablespoon, drop rounded balls of dough onto a baking sheet lined with parchment paper, spacing them about 2 inches apart. Bake in the preheated oven for 12-15 minutes, or until the edges are golden brown. The centers may look slightly underbaked, but they will firm up as they cool.
Step 7: Cool and Enjoy
Allow the cookies to cool on the baking sheet for 5 minutes before transferring them to a wire rack to cool completely. Enjoy your Crunchy Chocolate Chip Rice Krispie Cookies with a glass of milk or your favorite beverage!

Nutritional Information
Here’s a comprehensive look at the nutritional content for one Crunchy Chocolate Chip Rice Krispie Cookie (based on a recipe yielding 24 cookies):
| Nutrient | Amount per Cookie |
|---|---|
| Calories | 150 |
| Total Fat | 7g |
| Saturated Fat | 4g |
| Cholesterol | 20mg |
| Sodium | 100mg |
| Total Carbohydrates | 20g |
| Dietary Fiber | 0.5g |
| Sugars | 10g |
| Protein | 1g |
These cookies are a delightful treat, but moderation is key!
Healthier Alternatives for the Recipe
If you’re looking to make your Crunchy Chocolate Chip Rice Krispie Cookies a bit healthier, consider these modifications:
- Use Whole Wheat Flour: Swap half of the all-purpose flour for whole wheat flour to increase fiber content.
- Reduce Sugar: Cut the granulated sugar by 1/4 cup without sacrificing flavor.
- Add Nuts: Incorporate chopped nuts, such as walnuts or almonds, for added protein and healthy fats.
Serving Suggestions
To make your Crunchy Chocolate Chip Rice Krispie Cookies even more appealing, consider these serving ideas:
- Ice Cream Sandwiches: Place a scoop of your favorite ice cream between two cookies for a delightful dessert.
- Cookie Platter: Serve alongside other cookie varieties for a festive treat platter at parties or gatherings.
- Dunking Delight: Pair with a warm cup of coffee, hot chocolate, or milk for the ultimate dunking experience.
Common Mistakes to Avoid
To ensure your Crunchy Chocolate Chip Rice Krispie Cookies turn out perfectly, avoid these common pitfalls:
- Overmixing the Dough: This can lead to tough cookies. Mix just until combined.
- Not Measuring Ingredients Accurately: Use a kitchen scale for precise measurements, especially for flour.
- Baking Too Long: Keep an eye on your cookies; they should be slightly soft in the center when removed from the oven.
Storing Tips for the Recipe
To keep your cookies fresh and delicious, follow these storage tips:
- Room Temperature: Store cookies in an airtight container at room temperature for up to one week.
- Freezing: For longer storage, freeze the cookies in a single layer on a baking sheet, then transfer them to a freezer-safe bag. They can last up to three months.
- Reheating: To enjoy a warm cookie, microwave for 10-15 seconds straight from the freezer.
Conclusion
In summary, Crunchy Chocolate Chip Rice Krispie Cookies are a delightful treat that combines the best of both worlds: the classic cookie and the crispy crunch of Rice Krispies. With simple ingredients and easy steps, you can whip up a batch in no time. Try this recipe today and share your feedback in the comments section! Don’t forget to subscribe for more delicious updates!
FAQs
Q1: Can I make the dough ahead of time?
A1: Yes! You can prepare the dough and refrigerate it for up to 3 days before baking.
Q2: Can I use different types of chocolate chips?
A2: Absolutely! Feel free to experiment with dark chocolate, white chocolate, or even peanut butter chips for a unique twist.
Q3: How do I ensure my cookies are crunchy?
A3: Make sure to bake them until the edges are golden brown and allow them to cool completely on a wire rack.
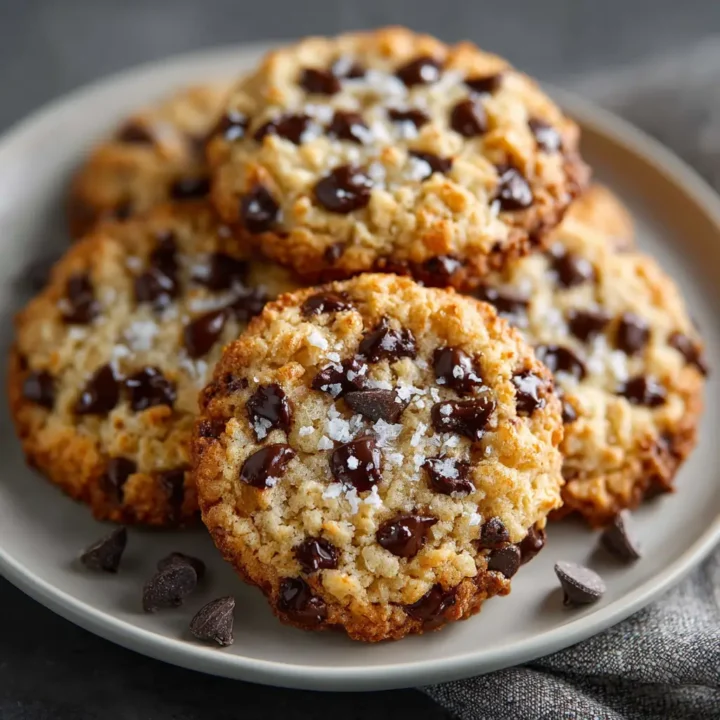
Crunchy Chocolate Chip Rice Krispie Cookies
Ingredients
- 1 cup unsalted butter, softened
- For a rich and moist cookie.
- 1 cup brown sugar, packed
- Adds a deep caramel flavor and chewiness.
- 1/2 cup granulated sugar
- Balances sweetness and enhances texture.
- 2 large eggs
- Provides structure and binds the ingredients.
- 1 teaspoon vanilla extract
- Infuses a warm flavor.
- 2 cups all-purpose flour
- The base for your cookie dough.
- 1 teaspoon baking soda
- Helps cookies rise and become fluffy.
- 1/2 teaspoon salt
- Enhances overall flavor.
- 2 cups Rice Krispies cereal
- Adds signature crunch and texture.
- 1 cup semi-sweet chocolate chips
- Melts beautifully and provides rich flavor.
Instructions
- Preheat the Oven: Preheat your oven to 350°F (175°C).
- Cream the Butter and Sugars: In a large mixing bowl, cream together 1 cup softened butter, 1 cup brown sugar, and 1/2 cup granulated sugar until light and fluffy.
- Add Eggs and Vanilla: Beat in 2 large eggs and 1 teaspoon vanilla extract until well combined.
- Combine Dry Ingredients: In a separate bowl, whisk together 2 cups all-purpose flour, 1 teaspoon baking soda, and 1/2 teaspoon salt. Gradually add to the wet ingredients.
- Fold in Rice Krispies and Chocolate Chips: Gently fold in 2 cups Rice Krispies and 1 cup chocolate chips.
- Scoop and Bake: Drop rounded balls of dough onto a parchment-lined baking sheet, spacing them about 2 inches apart. Bake for 12-15 minutes until golden brown.
- Cool and Enjoy: Let cool on the baking sheet for 5 minutes before transferring to a wire rack.
Did you make this recipe?
Please leave a comment on the blog or share a photo on Facebook


