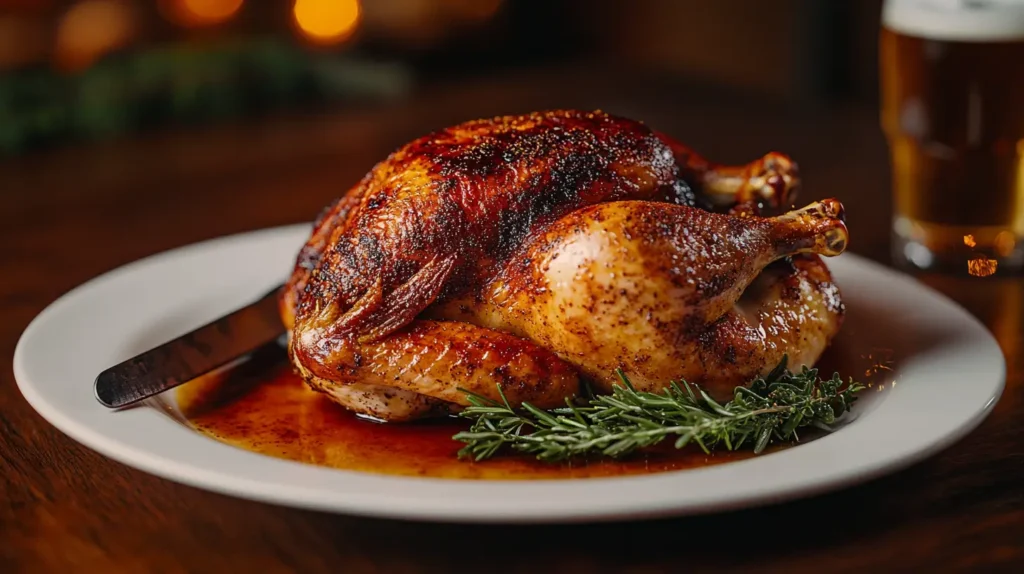
Ever wondered how to achieve incredibly juicy chicken with irresistibly crispy skin? Beer can chicken is my secret weapon! This clever technique involves perching a seasoned bird atop a beer can on your grill, creating a self-basting marvel that cooks from the inside out. I’ve been wowing friends with this method for years – the steam from the beer keeps the meat moist while the outside roasts to golden perfection. The best part? You can customize the seasonings to suit any flavor profile you love. Whether you’re hosting a backyard barbecue or just making dinner, this foolproof method delivers spectacular results every time. Ready to transform your ordinary chicken into something extraordinary?
JUMP TO SECTION
ingredients You’ll Need for Beer Can Chicken
The beauty of beer can chicken lies in its simplicity! Here’s everything you need to create this show-stopping dish:
For the chicken:
- 1 whole chicken (4-5 pounds), giblets removed
- 2 tablespoons olive oil or melted butter
- 3 cloves garlic, minced (trust me, fresh makes a difference!)
For the dry rub:
- 2 tablespoons brown sugar (creates that gorgeous caramelization)
- 1 tablespoon paprika (for color and mild smoky flavor)
- 1 tablespoon salt
- 2 teaspoons black pepper
- 1 teaspoon onion powder
- 1 teaspoon garlic powder
- 1 teaspoon dried thyme
- ½ teaspoon cayenne pepper (adjust to your heat preference)
The star of the show:
- 1 can (12 oz) of beer – I prefer a lager or ale, but use your favorite!
- 1 beer can chicken holder (optional but helpful for stability)
- Wood chips for smoking (optional for extra flavor dimension)
I’ve found that room-temperature chicken absorbs seasonings better, so try to pull your bird from the fridge about 30 minutes before you start prepping. And don’t worry if you don’t have every spice listed – this recipe is forgiving and adaptable to what you have on hand. The essential elements are really just the chicken, beer, and some kind of seasoning to create that irresistible crust!
Step-by-Step Instructions for Beer Can Chicken
Let’s break down this beer-can chicken method into manageable steps that’ll have you grilling like a pro!
Preparation Phase
- Prep your chicken – Remove your chicken from the refrigerator about 30 minutes before cooking. This helps it cook more evenly. Give it a good rinse inside and out with cold water, then pat it completely dry with paper towels. A dry chicken equals crispy skin!
- Create your flavor bomb – In a small bowl, mix all your dry rub ingredients until well combined. This magical mixture is what’s going to transform your chicken from ordinary to extraordinary!
- Season generously – Brush the entire chicken with olive oil or melted butter – don’t be shy! This helps your seasonings stick and promotes that gorgeous golden skin. Now sprinkle your rub all over the chicken, including inside the cavity. Use your hands to massage it into every nook and cranny. Yes, it’s a bit messy, but so worth it!
- Prepare the beer – Here’s where the magic happens! Open your beer can and drink (or pour out) about a quarter of it. Using a can opener, make 2-3 additional holes in the top of the can. This allows more aromatic steam to escape and flavor your chicken from the inside out.
Cooking Process
- Fire up your heat source – For grilling, set up for indirect heat at around 350°F (175°C). If you’re using an oven, preheat to 375°F (190°C). Both methods work beautifully!
- Mount your chicken – Place the beer can on a flat surface and carefully lower the chicken cavity over it so that the chicken sits upright with the can inside. It should look like your chicken is sitting on a throne – because it deserves royal treatment!
- Position for cooking:
- On a grill: Place your chicken (standing on the can) on the indirect heat side
- In an oven: Place it in a roasting pan to catch those flavorful drippings
- Let it work its magic – Close the lid or oven door and let it cook for approximately 1 hour and 15 minutes. The exact time depends on your chicken’s size, but you’re aiming for an internal temperature of 165°F (74°C) in the thickest part of the thigh. No thermometer? No problem! The chicken is done when the juices run clear and the legs wiggle easily.
- Rest for juiciness – This step is crucial! Carefully remove the chicken with the can still intact (use oven mitts – everything is hot!) and let it rest for 10 minutes. This allows the juices to redistribute throughout the meat. Then use tongs and a spatula to lift the chicken off the can before carving.
Remember, the first time might feel a bit awkward, but I promise it gets easier! The result is so worth it – juicy meat, crispy skin, and that wonderful feeling of mastering a show-stopping cooking technique!

Additional Tips & Recipe Variations for Beer Can Chicken
Now that you’ve mastered the basics of beer can chicken, let’s take your grilling game to the next level with some pro tips and creative variations!
Pro Tips for Perfect Beer Can Chicken
- Stability is key – If your chicken keeps tipping over (we’ve all been there!), use a beer can chicken holder or create a natural tripod with two legs and the can. You can also place a small potato or onion on each side as “training wheels.”
- Keep it moist – For extra juicy meat, spritz your chicken with apple juice every 30 minutes during cooking. I keep a spray bottle ready just for this purpose!
- Watch the skin – If you notice your chicken skin browning too quickly, loosely tent it with aluminum foil. We want crispy, not charred!
- Smoke it up – For an incredible smoky dimension, add soaked wood chips to your grill. Apple and cherry wood complement chicken beautifully without overpowering it.
- Let it rest – I know it’s tempting to dig in right away, but allowing your chicken to rest for 10 minutes after cooking makes all the difference in juiciness.
Flavor Variations to Keep Things Exciting
1. Herb Garden Delight
Replace the dry rub with a vibrant herb mixture:
- 4 tablespoons fresh herbs (rosemary, thyme, sage) finely chopped
- 2 teaspoons lemon zest
- 2 tablespoons olive oil
- Use a lemon-flavored beer or add lemon slices to your regular beer
This variation is perfect for spring and summer gatherings when fresh herbs are abundant!
2. Spicy Southwest Fiesta
Kick up the heat with these adjustments:
- Double the cayenne pepper in your rub
- Add 1 tablespoon of cumin and 1 teaspoon of coriander
- Use a Mexican beer like Corona
- Add the juice of one lime to the beer can
- Serve with grilled corn and avocado for a complete meal
3. Asian-Inspired Twist
Take your taste buds on a journey with these changes:
- Replace the original rub with a mixture of Chinese five-spice powder, ground ginger, and garlic
- Brush with hoisin sauce during the last 15 minutes of cooking
- Try using a rice beer or add lemongrass stalks to your regular beer can
- Garnish with sliced green onions and sesame seeds before serving
4. Classic BBQ Lover’s Version
Sometimes you just can’t beat the classics:
- Use your favorite BBQ rub for seasoning
- Baste with your go-to BBQ sauce during the last 20 minutes (any earlier and it might burn)
- For a fun twist, try using root beer instead of beer in the can!
- Serve with classic sides like coleslaw and baked beans
Don’t be afraid to experiment with your own flavor combinations! The beer can method is incredibly versatile and forgiving. The technique ensures moist, tender meat regardless of your seasoning choices, so you can let your creativity run wild. What’s your favorite flavor profile? I’d love to hear how your beer-can chicken adventures turn out!

Nutritional Information & Health Benefits of Beer Can Chicken
Beyond its mouthwatering flavor, beer can chicken brings impressive nutritional benefits to your table! Each serving provides approximately 40-50g of complete protein, making it excellent for muscle maintenance and recovery. The cooking method is naturally healthier too – as the chicken cooks, fat drips away while the beer steam keeps everything juicy without added oils.
A typical serving contains about 350-450 calories (less if you remove the skin after cooking), along with beneficial B vitamins for energy metabolism and selenium for immune support. What I love most about this technique is how it delivers restaurant-quality results while maintaining the chicken’s nutritional integrity.
For a healthier version, try reducing salt in your rub, using light beer, and serving with grilled vegetables. You can also remove the skin after cooking to significantly reduce fat content while still enjoying that perfectly juicy meat. It’s a guilt-free way to indulge in incredibly flavorful chicken that will satisfy both your taste buds and your nutritional needs!
Frequently Asked Questions
Can I use something other than beer?
Absolutely! Try root beer, apple juice, wine, or even water with herbs. The liquid’s main job is creating moisture-preserving steam, so feel free to experiment with what you have on hand.
Is the chicken actually infused with beer flavor?
The beer provides subtle flavor notes through steam but doesn’t strongly flavor the meat itself. Your rub or seasonings will contribute most of the taste you’ll experience.
How do I know when my chicken is done?
For best results, use a meat thermometer inserted into the thickest part of the thigh – it should read 165°F (74°C). No thermometer? Look for clear juices and legs that move easily in their sockets.
Can I make beer can chicken in the oven?
Yes! Prepare as directed, then cook at 375°F (190°C) in a roasting pan until it reaches 165°F. For extra-crispy skin, broil for the final 2-3 minutes.
Why is my chicken falling over?
Try using a beer can chicken holder, positioning the legs forward to create a tripod effect, or placing small vegetables around the base for stability.
Can I prep this in advance?
Definitely! Apply the rub up to 24 hours ahead and refrigerate. This actually enhances flavor as the seasonings have time to penetrate the meat.
Is beer can chicken safe for kids to eat?
Yes! The alcohol completely evaporates during cooking, leaving only flavor behind. It’s perfectly safe for the entire family to enjoy.
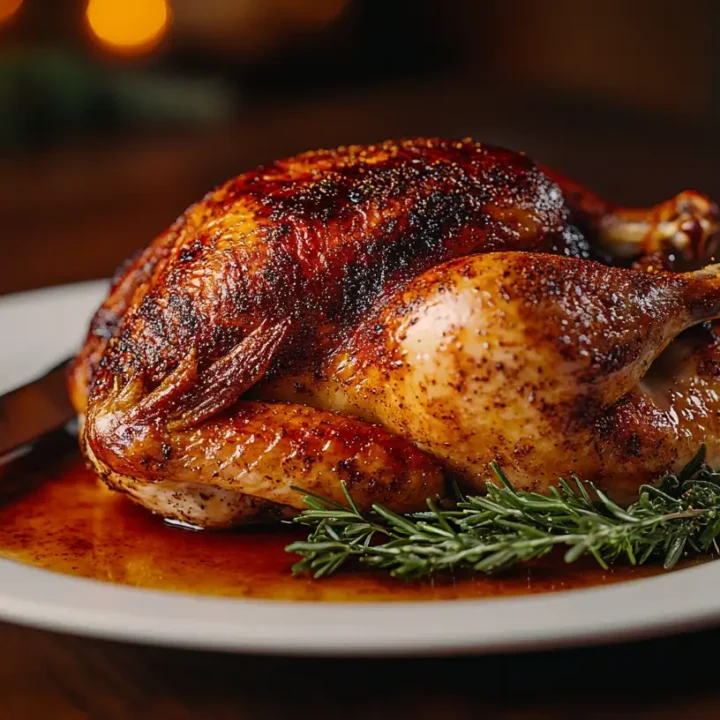
Beer Can Chicken
Ingredients
- 1 whole chicken (4-5 pounds), giblets removed
- 2 tablespoons olive oil or melted butter
- 3 cloves garlic, minced
- 2 tablespoons brown sugar
- 1 tablespoon paprika
- 1 tablespoon salt
- 2 teaspoons black pepper
- 1 teaspoon onion powder
- 1 teaspoon garlic powder
- 1 teaspoon dried thyme
- ½ teaspoon cayenne pepper
- 1 can (12 oz) beer (lager or ale recommended)
Instructions
- Remove chicken from refrigerator 30 minutes before cooking. Rinse and pat dry completely.
- Mix all dry rub ingredients in a small bowl.
- Brush chicken with oil/butter and thoroughly coat with dry rub, including the inside cavity.
- Open the beer, remove ¼ of the contents, and make 2-3 additional holes in the top of the can.
- For grill: Prepare for indirect heat at 350°F (175°C). For oven: Preheat to 375°F (190°C).
- Place the beer can on a flat surface and carefully lower the chicken cavity over it.
- Position chicken on the grill (indirect heat side) or in a roasting pan for the oven.
- Cook for approximately 1 hour 15 minutes until internal temperature reaches 165°F (74°C).
Notes
- For extra juicy meat, spritz with apple juice every 30 minutes during cooking
- If skin browns too quickly, loosely tent with foil
- For added flavor, try wood chips for smoking (apple or cherry work well)
- Beer can be substituted with soda, juice, wine, or broth
Did you make this recipe?
Please leave a comment on the blog or share a photo on Facebook
What do you think of these recipes?
There are no reviews yet. Be the first one to write one.

