Have you ever wondered how to make Brine chicken wings that are juicy, flavorful, and impossible to resist? The secret is bringing—a simple yet transformative technique that locks in moisture and enhances every bite with bold, savory goodness.
Whether you’re planning a game-day feast, a family dinner, or just craving the ultimate crispy wings, this method guarantees delicious results every time. With just a few ingredients and easy steps, you’ll discover how to elevate your wings from ordinary to extraordinary. Let’s dive into the recipe and unlock the magic of bringing!
Table of Contents
Key Benefits of Brining Chicken Wings
Brining is more than just a cooking technique—it’s a game-changer for achieving juicy, flavorful chicken wings that everyone will rave about. Here’s why brining works wonders:
- Moisture Retention: The saltwater solution helps your chicken wings retain moisture, keeping them tender and juicy even after cooking. No more dry, overcooked wings!
- Enhanced Flavor: Brining allows the wings to absorb all the flavors from the seasoning, creating a deep, savory taste that goes beyond just surface seasoning. Herbs, spices, and even citrus can be infused into the meat for maximum flavor.
- Crispier Skin: By drawing out excess moisture from the skin, brining creates the perfect environment for crispy, golden skin when baked or fried. You get that satisfying crunch without sacrificing tenderness.
- Even Cooking: Brined wings cook more evenly, reducing the chances of dry spots or undercooked areas. The result? Consistently perfect wings, every time.
Ingredients for Brining Chicken Wings
Now that you’re excited about the benefits of bringing, let’s gather the ingredients to get started. Don’t worry—this recipe uses simple, easy-to-find ingredients that will transform your wings into something truly special.
For the Brine:
- Water – 4 cups (acts as the base of the brine solution)
- Kosher Salt – ¼ cup (helps draw moisture into the chicken and enhances flavor)
- Brown Sugar – 2 tablespoons (adds a subtle sweetness that balances the saltiness)
- Garlic Cloves – 2, smashed (infuses the brine with rich, aromatic flavor)
- Black Peppercorns – 1 tablespoon (adds a slight kick and depth)
- Herbs (optional) – A few sprigs of thyme or rosemary (for extra flavor infusion)
- Citrus (optional) – 1 lemon, quartered (adds brightness and a zesty touch)
For the Chicken Wings:
- Chicken Wings – 10-12 whole wings (the star of the show!)
- Olive Oil – 1 tablespoon (for brushing the wings before cooking to help with crisping)
Tips for Success:
- Kosher Salt vs. Table Salt: Make sure to use kosher salt, as it’s less dense than table salt. If you must use table salt, reduce the amount by half to avoid overly salty wings.
- Herb & Citrus Variations: Feel free to experiment with different herbs or add a splash of apple cider vinegar to the brine for a unique twist.
- Chicken Size: Adjust the brine ingredients based on the number of wings you’re preparing. The general rule is to use 1 cup of water for every 3-4 wings.
With your ingredients in hand, you’re ready to start the brining process. This simple mix of water, salt, sugar, and spices is the key to unlocking juicy, flavorful wings that will be the highlight of your next meal! Ready to move on to the next step? Let’s get to brining!
Instructions for Brining Chicken Wings
Now that we have all our ingredients ready, let’s dive into the brining process! Don’t worry—this step is straightforward and will make your wings incredibly juicy and flavorful.
Step 1: Prepare the Brine
- Combine the brine ingredients: In a large bowl or pot, mix the water, kosher salt, brown sugar, garlic cloves, black peppercorns, and any herbs or citrus you’re using. Stir until the salt and sugar dissolve completely.
- Bring it to a simmer: Place the mixture on the stove over medium heat and bring it to a gentle simmer. This helps release the flavors from the garlic, pepper, and herbs. Once it is simmering, remove it from the heat and let it cool completely.
Pro Tip: If you’re short on time, you can cool the brine quickly by adding ice cubes to the mixture once it’s off the heat.
Step 2: Brine the Chicken Wings
- Submerge the wings: Place your chicken wings into a large resealable bag or a container with a lid. Pour the cooled brine over the wings, ensuring they’re fully submerged. Seal the bag or cover the container tightly.
- Refrigerate: Let the wings brine in the refrigerator for at least 2 hours, but up to 12 hours for maximum flavor. The longer the wings soak, the more flavorful and tender they will be.
Pro Tip: Don’t brine for too long—over-brining can result in overly salty wings. Stick to the 2-12 hour window for best results.
Step 3: Prepare for Cooking
- Remove the wings from the brine: After brining, remove the wings and pat them dry with paper towels. This is crucial for achieving crispy skin when cooking.
- Season the wings: While the wings are already full of flavor from the brine, feel free to add a light seasoning of salt, pepper, or your favorite spices before cooking. This extra layer of flavor will complement the brine.
Pro Tips and Variations for Brining Chicken Wings
Now that you’ve mastered the basics of bringing, let’s elevate your wings even further with some expert tips and variations. Whether you’re looking to customize the flavor or perfect your cooking technique, these pro tips will take your wings to the next level.
Pro Tips for Perfect Wings:
- Pat Dry for Crispy Skin: After brining, make sure to pat your wings dry with paper towels before cooking. This step is key for achieving that coveted crispy skin, especially if you’re baking or frying them.
- Don’t Skip the Resting Time: Let your wings rest for 5-10 minutes after they come out of the brine. This allows the juices to be redistributed, keeping them tender and flavorful.
- Experiment with Seasonings: While bringing in great flavor, feel free to toss your wings in a dry rub or marinade for an extra kick. Garlic powder, paprika, and cayenne pepper work wonderfully for a smoky, spicy finish.
- Use a Cooling Rack for Baking: If you’re baking your wings, place them on a cooling rack set over a baking sheet. This allows air to circulate around the wings, ensuring even crispiness.
Flavor Variations:
- Sweet & Spicy: Add a bit of honey and chili flakes to your brine for a sweet-and-spicy kick that’ll wow your taste buds.
- Herb-Infused: Experiment with fresh herbs like rosemary, thyme, or oregano in your brine for an aromatic, savory twist. You can also add citrus zest for a refreshing, zesty note.
- Citrus Twist: If you’re a fan of bright, zesty flavors, try adding orange or lime slices to the brine. The citrus will give your wings a refreshing burst of flavor.
Cooking Variations:
- Baking: For perfectly crispy wings, bake at 400°F (200°C) for 25-30 minutes, flipping halfway through. Make sure the wings are well-spaced on the baking sheet for even cooking.
- Frying: For a deep, golden crisp, fry the wings at 375°F (190°C) for 8-10 minutes until golden and crispy. Be sure to avoid overcrowding the pan to maintain that crispy texture.
- Grilling: If you prefer a smoky flavor, grill the wings over medium heat for about 15-20 minutes, turning occasionally. Brush with your favorite sauce for extra flavor.
With these pro tips and variations, you can tailor your brined chicken wings to suit any flavor profile or cooking method you desire. The possibilities are endless—so get creative and make these wings your own! Ready to serve? Let’s move on to the next step.
Serving Suggestions for Brined Chicken Wings
Now that your brined chicken wings are cooked to perfection, it’s time to think about how to serve them! Whether you’re hosting a gathering or enjoying a quiet meal, the right serving ideas can elevate the experience and complement the rich, savory flavor of your wings.
Classic Pairings:
- Dipping Sauces: Serve your wings with a variety of dipping sauces like creamy ranch, tangy blue cheese, or a sweet-and-spicy honey mustard. These will balance the crispy, flavorful wings with an extra burst of taste.
- Vegetable Sides: Pair your wings with crisp, refreshing vegetables like carrot sticks, celery, or cucumber slices. These crunchy sides are a perfect contrast to the juicy wings and add a healthy touch to the meal.
- Potato Dishes: Whether it’s classic French fries, crispy wedges, or a creamy mashed potato dish, potatoes are a tried-and-true side that pairs beautifully with wings. The mild flavor complements the bold taste of the brined chicken wings.
Fun & Creative Ideas:
- Wing Bar: Create a wing bar by offering a variety of sauces and seasonings on the side. This allows guests to customize their wings with different flavors, such as buffalo, BBQ, or garlic parmesan.
- Salads: For a lighter option, serve your wings alongside a fresh salad. A tangy coleslaw or a vibrant citrus salad will provide a refreshing balance to the richness of the wings.
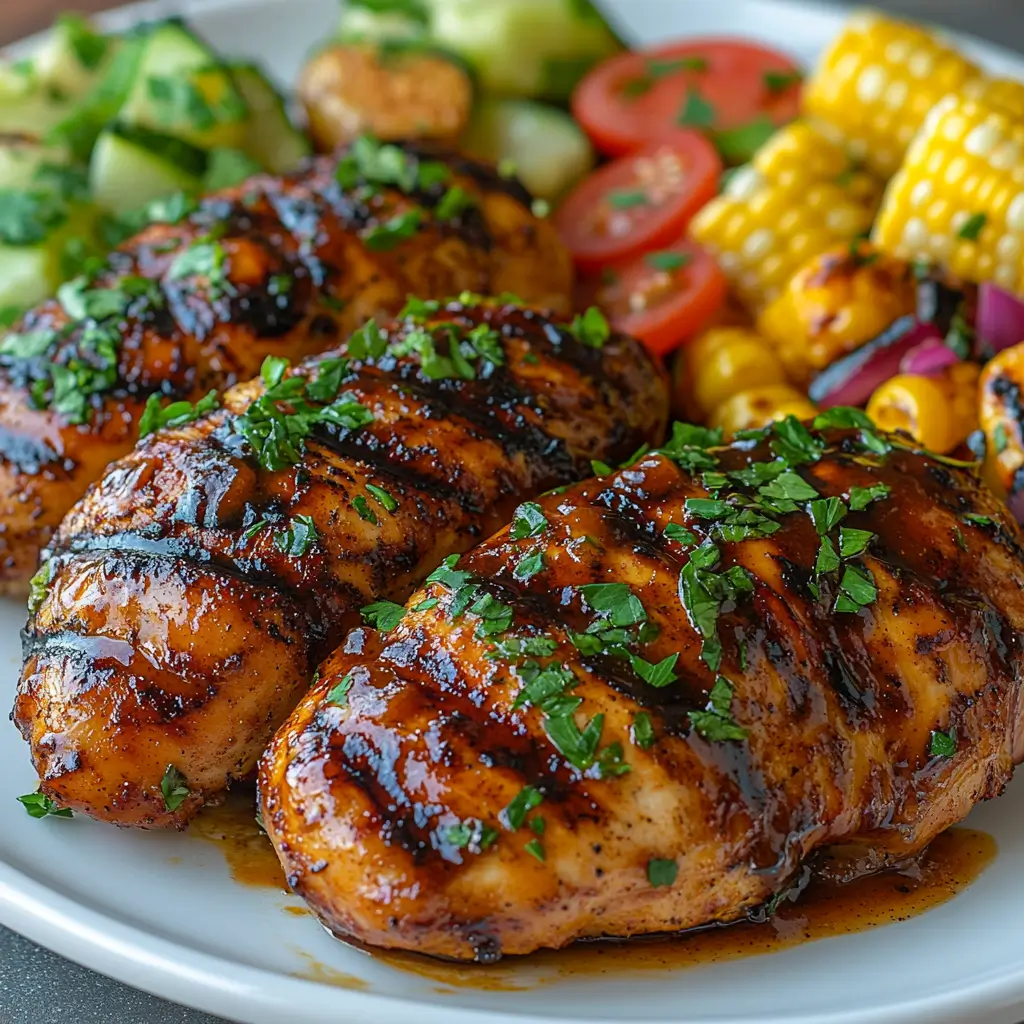
- Grilled Corn: If you’re serving wings on the grill, why not add some charred corn on the cob to the menu? The smoky sweetness of the corn complements the wings perfectly.
For a Full Meal:
- Rice or Quinoa: For a more substantial meal, pair your wings with a side of rice or quinoa. The fluffy grains soak up any extra sauce, making every bite a satisfying experience.
- Mac and Cheese: If you’re craving comfort food, mac and cheese is the ultimate side. The creamy, cheesy dish pairs wonderfully with the crispy, flavorful wings, creating a hearty, indulgent meal.
Drink Pairings:
- Beer: For a classic pairing, serve your wings with a cold beer. A light lager or hoppy IPA works well with the savory, crispy wings.
- Citrusy Cocktails: If you’re looking for something more festive, try pairing your wings with a citrusy cocktail like a margarita or mojito. The fresh, zesty flavors will complement the wings’ savory profile.
FAQs About Brining Chicken Wings
1. How long should I brine chicken wings?
The ideal brining time is anywhere between 2 to 12 hours. If you’re in a rush, even a short 2-hour brine will make a noticeable difference in flavor and moisture. For the best results, let them soak overnight, but avoid leaving them for more than 12 hours to prevent the wings from becoming too salty.
2. Can I brine frozen chicken wings?
Yes! You can brine frozen wings, but it’s best to thaw them first. Thawing ensures that the brine can properly penetrate the meat and infuse it with flavor. Simply place the wings in the fridge overnight to thaw before starting the brining process.
3. What if I don’t have kosher salt?
If you don’t have kosher salt, you can use regular table salt, but be sure to use half the amount called for in the recipe. Kosher salt is less dense, so you’ll need less table salt to avoid an overly salty brine.
4. Can I add other seasonings to the brine?
Absolutely! Feel free to get creative. You can add herbs like rosemary, thyme, or bay leaves for extra flavor or even experiment with spices like smoked paprika or cayenne pepper for a kick. Just remember that the brine is meant to enhance the wings, not overpower them, so keep the balance in mind.
5. Do I need to rinse the wings after brining?
No, you don’t need to rinse the wings after brining. In fact, rinsing can wash away some of the flavor that’s been absorbed. Instead, just pat the wings dry with paper towels to remove excess moisture, which will help achieve that crispy skin when cooking.

Brine Chicken Wings: The Ultimate Flavor Hack
Ingredients
- 4 cups cold water
- ¼ cup kosher salt
- 2 tablespoons sugar (optional, for balance)
- 1 teaspoon black peppercorns
- 2 cloves garlic, smashed
- 1 bay leaf (optional)
- ½ teaspoon smoked paprika (optional, for extra depth)
- Juice of ½ lemon or 2 tablespoons apple cider vinegar (optional, for slight tang)
Instructions
Prepare the Brine
- In a large bowl or container, combine cold water, salt, and sugar. Stir until fully dissolved.
- Add black peppercorns, garlic, bay leaf, smoked paprika, and lemon juice (or vinegar) for extra flavor.
Brine the Chicken Wings
- Submerge chicken wings in the brine, ensuring they are fully covered.
- Cover and refrigerate for at least 2–4 hours, or up to overnight for maximum juiciness.
Remove & Dry
- Drain the brine and pat the wings dry thoroughly with paper towels.
- For extra crispy skin, place the wings on a wire rack in the fridge for 30–60 minutes before cooking.
Cook Your Wings (Choose Your Preferred Method)
- Grill: Cook over medium-high heat for 20–25 minutes, flipping occasionally.
- Bake: Roast at 425°F (220°C) for 40–45 minutes, flipping halfway.
- Fry: Heat oil to 375°F (190°C) and fry for 8–10 minutes until golden brown.
- Air Fry: Cook at 400°F (200°C) for 20–25 minutes, shaking halfway.
Serve & Enjoy
- Toss wings in your favorite sauce or dry rub, and serve immediately!
Notes
✔ Use cold water to prevent bacterial growth.✔ Add aromatics like garlic, citrus, or bay leaves for a deeper flavor.✔ For crispy wings, let them air-dry in the fridge after brining.

What do you think of these recipes?
There are no reviews yet. Be the first one to write one.