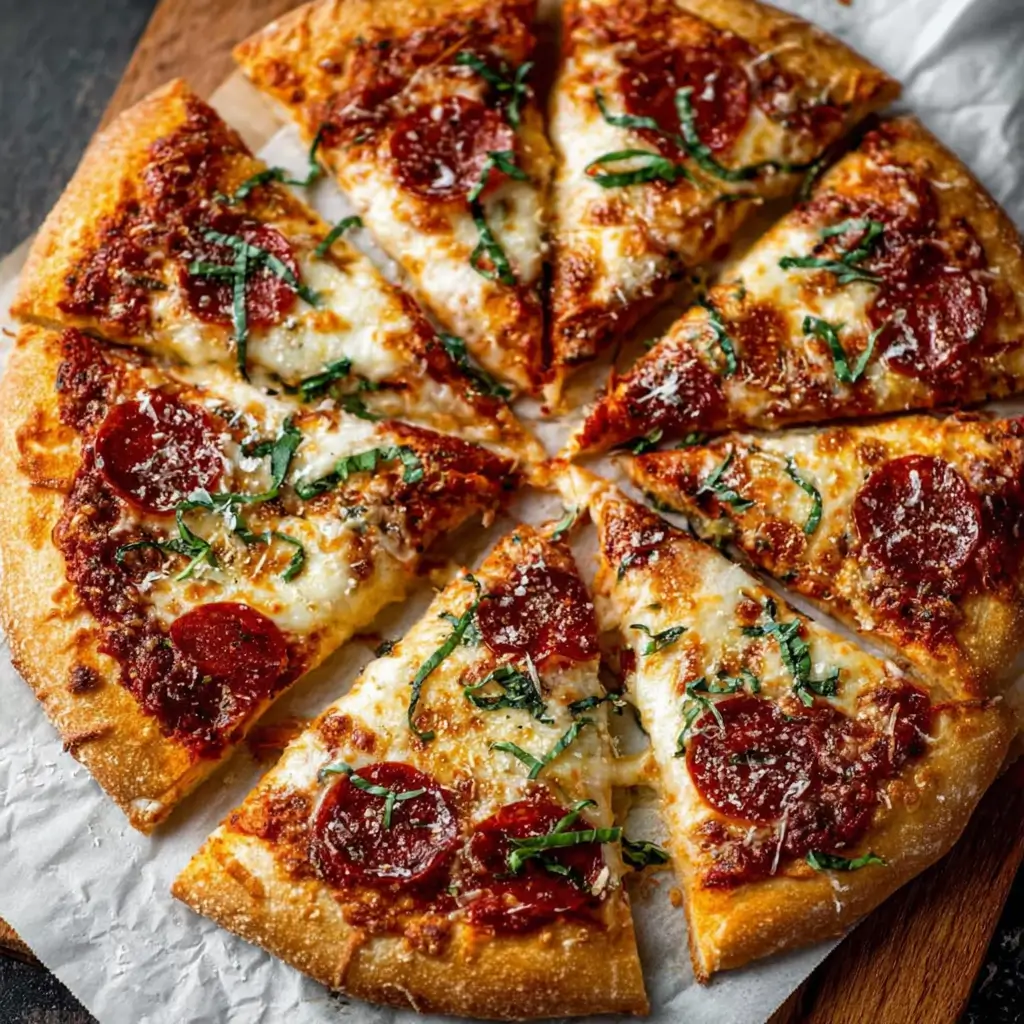
Have you ever craved the fresh, vibrant flavors of bruschetta but wanted something a bit heartier? If so, Bruschetta Pizza is the perfect solution! This delicious dish combines the classic Italian appetizer with the beloved comfort of pizza, creating a mouthwatering experience that’s both satisfying and refreshing. With its bright tomato topping and aromatic basil, this pizza challenges the conventional and offers a delightful twist that will impress your family and friends.
Let’s explore how to make this easy and flavorful recipe!
Ingredients List
To prepare Bruschetta Pizza, gather the following ingredients:
- 1 pre-made pizza crust (store-bought or homemade)
- 1 cup cherry tomatoes (halved)
- 1/4 cup fresh basil (chopped)
- 2 cloves garlic (minced)
- 1 tablespoon olive oil
- 1 cup mozzarella cheese (shredded)
- Salt and pepper to taste
- Balsamic glaze (for drizzling, optional)
Substitutions:
- Pizza Crust: Use a gluten-free crust if needed.
- Cherry Tomatoes: Substitute with diced Roma tomatoes for a different texture.
- Mozzarella Cheese: Feta cheese can be used for a tangy flavor.
Step-by-Step Instructions
Step 1: Preheat the Oven
Preheat your oven to 475°F (245°C). A hot oven is essential for achieving a crispy crust.
Step 2: Prepare the Tomato Mixture
In a medium bowl, combine the halved cherry tomatoes, chopped basil, minced garlic, olive oil, salt, and pepper. Toss gently to combine and let it sit for a few minutes to allow the flavors to meld.
Step 3: Prepare the Pizza Base
Roll out your pre-made pizza crust on a floured surface to your desired thickness. Transfer the crust to a baking sheet or pizza stone.
Step 4: Add Cheese
Sprinkle the shredded mozzarella cheese evenly over the pizza crust. This will create a deliciously cheesy base for your toppings.
Step 5: Top with Tomato Mixture
Spoon the tomato mixture evenly over the cheese. Make sure to distribute the tomatoes and basil evenly for balanced flavor in every bite.
Step 6: Bake the Pizza
Place the pizza in the preheated oven and bake for about 12-15 minutes, or until the crust is golden brown and the cheese is bubbly.
Step 7: Drizzle with Balsamic Glaze
Once baked, remove the pizza from the oven and drizzle with balsamic glaze if desired, adding a sweet and tangy finish.

Nutritional Information
Here’s a breakdown of the nutritional content per serving (based on 4 servings):
- Calories: 260
- Total Fat: 10g
- Saturated Fat: 5g
- Cholesterol: 25mg
- Sodium: 320mg
- Total Carbohydrates: 30g
- Dietary Fiber: 2g
- Sugars: 3g
- Protein: 10g
Healthier Alternatives for the Recipe
If you’d like to make Bruschetta Pizza a bit healthier, consider these modifications:
- Whole Wheat Crust: Opt for a whole wheat pizza crust to increase fiber content.
- Low-Fat Cheese: Use low-fat mozzarella cheese to reduce calories and fat.
- Add Veggies: Incorporate additional toppings like spinach, bell peppers, or red onions for extra nutrients.
Serving Suggestions
This pizza is versatile and can be served in various ways:
- Pair with a Salad: Serve alongside a mixed greens salad with a light vinaigrette for a complete meal.
- Wine Pairing: A glass of Pinot Grigio complements the flavors beautifully.
- Cut into Appetizer Portions: Slice into smaller pieces for a delightful appetizer at gatherings.
Common Mistakes to Avoid
- Overloading on Toppings: Keep the toppings light to ensure the crust cooks properly and remains crispy.
- Not Preheating the Oven: A preheated oven is crucial for achieving the perfect crust.
- Skipping the Balsamic Glaze: Don’t forget the drizzle! It adds a necessary depth of flavor.
Storing Tips for the Recipe
To keep your Bruschetta Pizza fresh:
- Room Temperature: Store leftovers in an airtight container at room temperature for up to 2 days.
- Refrigeration: For longer storage, keep in the fridge for up to 4 days.
- Reheating: Reheat slices in the oven at 350°F (175°C) for about 10 minutes to restore crispness.
Conclusion
In summary, Bruschetta Pizza is a delightful fusion of fresh flavors and comforting pizza that’s easy to prepare and perfect for any occasion. With just a few ingredients and simple steps, you can create a dish that’s sure to impress your guests and satisfy your cravings. Try this recipe today, and don’t forget to share your thoughts in the comments or subscribe for more delicious updates!
FAQs
Can I use homemade pizza dough?
Absolutely! Homemade dough can enhance the flavor and texture of your pizza.
Is this pizza suitable for vegetarians?
Yes, this recipe is entirely vegetarian-friendly!
Can I freeze leftover pizza?
While it’s best fresh, you can freeze leftovers. Wrap slices tightly and store in a freezer-safe container for up to 2 months.

Bruschetta Pizza
Ingredients
- 1 pre-made pizza crust (store-bought or homemade)
- 1 cup cherry tomatoes (halved)
- 1/4 cup fresh basil (chopped)
- 2 cloves garlic (minced)
- 1 tablespoon olive oil
- 1 cup mozzarella cheese (shredded)
- Salt and pepper to taste
- Balsamic glaze (for drizzling, optional)
Instructions
Step 1: Preheat the Oven
Preheat your oven to 475°F (245°C). A hot oven is essential for achieving a crispy crust.
Step 2: Prepare the Tomato Mixture
In a medium bowl, combine the halved cherry tomatoes, chopped basil, minced garlic, olive oil, salt, and pepper. Toss gently to combine and let it sit for a few minutes to allow the flavors to meld.
Step 3: Prepare the Pizza Base
Roll out your pre-made pizza crust on a floured surface to your desired thickness. Transfer the crust to a baking sheet or pizza stone.
Step 4: Add Cheese
Sprinkle the shredded mozzarella cheese evenly over the pizza crust. This will create a deliciously cheesy base for your toppings.
Step 5: Top with Tomato Mixture
Spoon the tomato mixture evenly over the cheese. Make sure to distribute the tomatoes and basil evenly for balanced flavor in every bite.
Step 6: Bake the Pizza
Place the pizza in the preheated oven and bake for about 12-15 minutes, or until the crust is golden brown and the cheese is bubbly.
Step 7: Drizzle with Balsamic Glaze
Once baked, remove the pizza from the oven and drizzle with balsamic glaze if desired, adding a sweet and tangy finish.