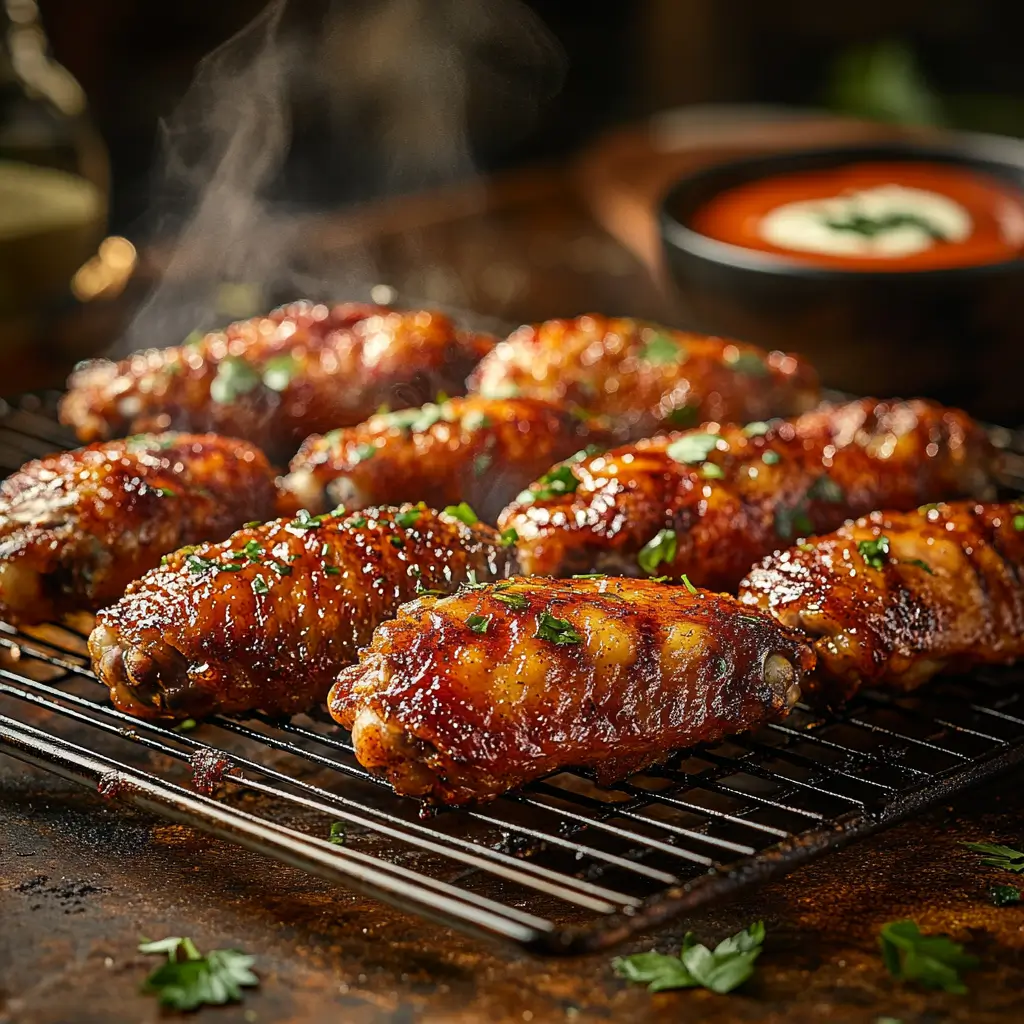
Craving crispy chicken wings without the deep fryer? You’re not alone—over 1.4 billion wings are devoured during Super Bowl weekend, yet most home cooks struggle to get that signature crunch. The good news is that you don’t need a deep fryer to pull it off. Our cheap and easy oven-baked chicken wings recipe delivers crispy, golden perfection with less mess and fewer calories—up to 30% less! Whether it’s game night or just a craving, these wings hit the spot with a simple trick that makes all the difference.
Ingredients List
For perfectly crispy oven-baked chicken wings, you’ll need:
- 2 pounds fresh chicken wings, separated into flats and drumettes
- 2 teaspoons baking powder (NOT baking soda)
- 1 teaspoon salt
- 1/2 teaspoon freshly ground black pepper
- 1/2 teaspoon garlic powder
- 1/2 teaspoon paprika (regular or smoked)
- 1/4 teaspoon cayenne pepper (optional, for heat)
- 2 tablespoons olive oil or vegetable oil
Potential Substitutions:
- No baking powder? A cornstarch coating (1 tablespoon) can create a similar crispy effect, though slightly different in texture.
- For a lower sodium option, use kosher salt instead of table salt and reduce the amount by half.
- Experiment with different spice blends like Italian seasoning, curry powder, or lemon pepper for varied flavor profiles.
- For an oil-free version, use a non-stick cooking spray instead of oil, though the crispiness may be slightly reduced.
The key to these wings is the combination of baking powder and salt, which draws moisture from the skin and creates those tiny bubbles that become wonderfully crispy during high-heat cooking.
Step-by-Step Instructions
Step 1: Prepare the Wings
Pat the chicken wings completely dry with paper towels. This is crucial – the less moisture on the skin, the crispier your wings will be. Place the wings in a large bowl.
Tip: For extra crispiness, you can place the wings on a wire rack in the refrigerator for 8 hours or overnight to air-dry the skin even more thoroughly.
Step 2: Create the Coating
In a small bowl, mix the baking powder, salt, pepper, garlic powder, paprika, and cayenne (if using). This combination not only helps create that crispy exterior but also adds flavor to your wings.
Tip: Make sure you’re using baking powder, not baking soda. Baking soda will give your wings an unpleasant metallic taste.
Step 3: Apply the Coating
Drizzle the oil over the wings, then sprinkle the baking powder mixture over them. Toss until all the wings are evenly coated. The thin layer of oil helps the coating adhere while promoting even browning.
Tip: Use tongs or wear gloves to ensure the coating is distributed evenly on all sides of each wing.
Step 4: Arrange for Baking
Preheat your oven to 250°F (120°C). Line a baking sheet with aluminum foil and place a wire rack on top. Arrange the wings skin-side up on the rack, ensuring they don’t touch each other.
Tip: The wire rack allows air to circulate around the entire wing, resulting in all-over crispiness rather than just on one side.
Step 5: Initial Low-Temperature Baking
Bake the wings at 250°F (120°C) for 30 minutes. This low-temperature first phase helps render the fat from under the skin without burning the exterior.
Tip: Don’t skip this step! The low-temperature phase is essential for achieving the perfect texture contrast between crispy skin and juicy meat.
Step 6: High-Temperature Crisping
Without removing the wings from the oven, increase the temperature to 425°F (220°C). Continue baking for an additional 40-50 minutes, turning the wings over halfway through. Bake until the skin is crispy and golden brown.
Tip: If your oven has a convection setting, use it during this high-temperature phase for even crispier results.
Step 7: Rest Before Serving
Allow the wings to rest for 5 minutes before serving. This brief resting period helps the juices redistribute throughout the meat while the exterior stays crispy.
Tip: For even more flavor, toss the hot wings in your favorite sauce right before serving or serve the sauce on the side for dipping.
Nutritional Information
Per serving (6 wings, approximately 8 oz):
- Calories: 320
- Total Fat: 22g
- Saturated Fat: 6g
- Cholesterol: 105mg
- Sodium: 580mg
- Total Carbohydrates: 1g
- Dietary Fiber: 0g
- Sugars: 0g
- Protein: 30g
These oven-baked wings contain approximately 30% fewer calories and 40% less fat than traditional deep-fried wings, making them a healthier alternative without sacrificing taste or texture.
Healthier Alternatives for the Recipe
Want to make these wings even healthier? Consider these modifications:
- Remove the skin: While this reduces the crispy factor, skinless wings contain approximately 50% less fat. If going this route, reduce the initial cooking time to 20 minutes.
- Use chicken breast strips: Cut boneless, skinless chicken breasts into wing-sized strips for a leaner alternative with similar flavors.
- Try cauliflower wings: For a vegetarian option, substitute equal amounts of cauliflower florets. Reduce cooking time to 20 minutes at low temperature and 25-30 minutes at high temperature.
- Reduce sodium: Cut the salt in half and add flavor with herbs like thyme, rosemary, or oregano.
- Air fryer adaptation: Cook in an air fryer at 380°F for 20-25 minutes, shaking the basket halfway through for even crispier wings with less oil.
These modifications maintain the delicious flavor profile while adapting to various dietary preferences and needs.
Serving Suggestions
Elevate your crispy chicken wing experience with these serving ideas:
- Classic combo: Serve with celery and carrot sticks plus blue cheese or ranch dipping sauce for a traditional presentation.
- Asian-inspired: Toss in a mixture of soy sauce, honey, ginger, and garlic for sticky-sweet wings. Garnish with sesame seeds and sliced green onions.
- Mediterranean platter: Pair with hummus, cucumber slices, and warm pita triangles for an international twist.
- Loaded potato skins: Serve alongside twice-baked potato skins topped with cheese and bacon for an indulgent game day spread.
- Refreshing contrast: Balance the rich wings with a crisp coleslaw dressed with apple cider vinegar or a light cucumber salad.
Personalized tip: Create a wing bar with various sauces (buffalo, BBQ, honey mustard, teriyaki) and toppings (blue cheese crumbles, sliced jalapeños, crispy garlic) to let everyone customize their wing experience.
Common Mistakes to Avoid
Even experienced cooks can fall prey to these wing-making errors:
- Skipping the drying step: Failing to thoroughly pat the wings dry results in steamed rather than crispy skin.
- Using baking soda instead of baking powder: This common mix-up leads to an unpleasant metallic taste.
- Overcrowding the pan: Wings need space for proper air circulation. Work in batches if necessary.
- Skipping the wire rack: Placing wings directly on the baking sheet causes them to sit in their own fat, resulting in soggy bottoms.
- Saucing too early: Adding sauce before the wings are fully cooked prevents the skin from crisping properly. Toss with sauce after cooking.
- Opening the oven frequently: This causes temperature fluctuations that extend cooking time and reduce crispiness.
- Do not turn the wings: For even browning, flip the wings halfway through the high-temperature cooking phase.
- Using frozen wings without thawing: This releases excess moisture during cooking, preventing proper crisping. Always thaw completely.
Storage Tips for the Recipe
Properly store your wings to maintain their quality:
- Refrigeration: Store leftover wings in an airtight container for up to 3-4 days in the refrigerator at 40°F (4°C) or below.
- Freezing: For longer storage, freeze cooked wings for up to 3 months in freezer-safe bags with as much air removed as possible.
- Separating sauce and wings: If possible, store sauce separately from plain wings to prevent soggy skin during storage.
- Reheating for crispiness: Reheat refrigerated wings in a 350°F (175°C) oven for 10-12 minutes, flipping them halfway through. Spritz with a little water before reheating to help maintain moisture.
- Avoid microwaving: While convenient, microwaves make crispy wings soggy. If you must use a microwave, reheat on 50% power and finish in a hot skillet to regain some crispiness.
- Meal prep potential: Prepare the wings through the drying and coating steps, then refrigerate for up to 24 hours before baking for a convenient make-ahead option.
Conclusion
These cheap & easy crispy chicken wings in the oven demonstrate that you don’t need a deep fryer or complex techniques to create wings that deliver on both texture and flavor. By using the simple science of baking powder and dual-temperature cooking, you can achieve that perfect balance of crispy exterior and juicy interior that wing enthusiasts crave.
Whether served as a game day appetizer, weeknight dinner, or party snack, these wings are sure to impress with their restaurant-quality crunch and customizable flavors. The best part? You’ll save money, reduce calories, and avoid the mess of traditional frying methods.
Try this recipe today and discover your new go-to method for perfect chicken wings every time!
FAQs
Q: Can I use frozen chicken wings for this recipe?
A: Yes, but thaw them completely and pat them very dry before proceeding with the recipe. Frozen wings release excess moisture that prevents proper crisping.
Q: Why use baking powder instead of flour for coating?
A: Baking powder is alkaline and helps break down proteins in the chicken skin, leading to better browning and crisping. Flour alone doesn’t create the same reaction.
Q: How can I tell when the wings are fully cooked?
A: Wings are done when they reach an internal temperature of 165°F (74°C), and the skin is golden brown and crispy. The meat should pull easily from the bone.
Q: Can I make these wings ahead of time for a party?
A: Yes! Cook them fully, then reheat in a 350°F (175°C) oven for 10-15 minutes until crispy again. Alternatively, prepare through the coating step and refrigerate for up to 24 hours before baking.
Q: Why the two-temperature cooking method?
A: The low-temperature first phase renders fat from under the skin, while the high-temperature second phase creates the crispy exterior. This method mimics the effect of deep frying without the oil.
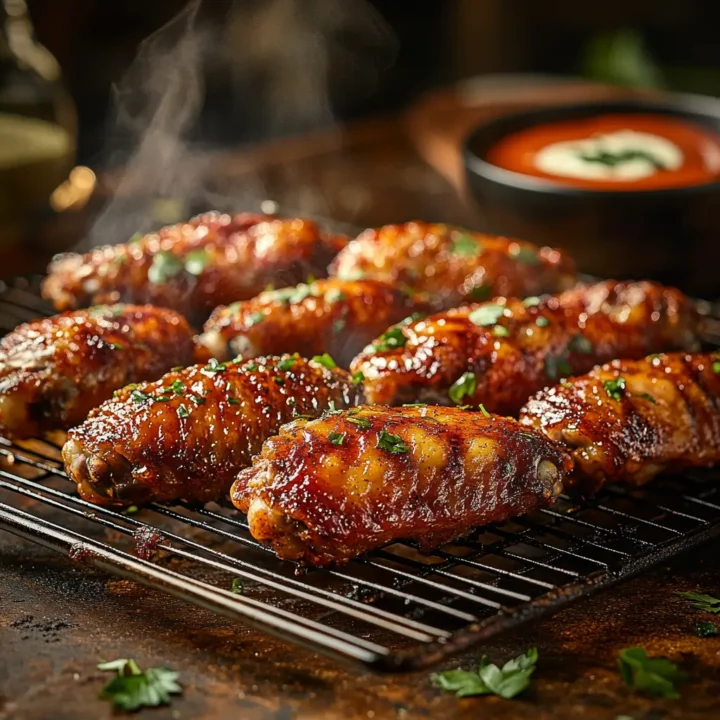
Crispy Chicken Wings in the Oven
Ingredients
- 2 pounds fresh chicken wings, separated into flats and drumettes
- 2 teaspoons baking powder (NOT baking soda)
- 1 teaspoon salt
- 1/2 teaspoon freshly ground black pepper
- 1/2 teaspoon garlic powder
- 1/2 teaspoon paprika (regular or smoked)
- 1/4 teaspoon cayenne pepper (optional, for heat)
- 2 tablespoons olive oil or vegetable oil
Instructions
- Pat chicken wings completely dry with paper towels. For extra crispiness, place on a wire rack in the refrigerator for 8 hours.
- Preheat the oven to 250°F (120°C). Line a baking sheet with foil and place a wire rack on top.
- In a small bowl, mix baking powder, salt, pepper, garlic powder, paprika, and cayenne.
- Place the wings in a large bowl, drizzle them with oil, then sprinkle them with the baking powder mixture. Toss until evenly coated.
- Arrange the wings skin-side up on the rack, ensuring they don't touch.
- Bake at 250°F for 30 minutes.
- Without removing the wings from the oven, increase the temperature to 425°F (220°C).
- Continue baking for 40-50 minutes, turning the wings halfway through, until the skin is crispy and golden brown.
- Let rest for 5 minutes before serving.
Notes
- The key to crispy wings is thoroughly drying them and using baking powder (not soda).
- For extra crispness, use the convection setting on your oven during the high-temperature phase.
- These wings can be tossed in your favorite sauce after cooking or served with dipping sauces.