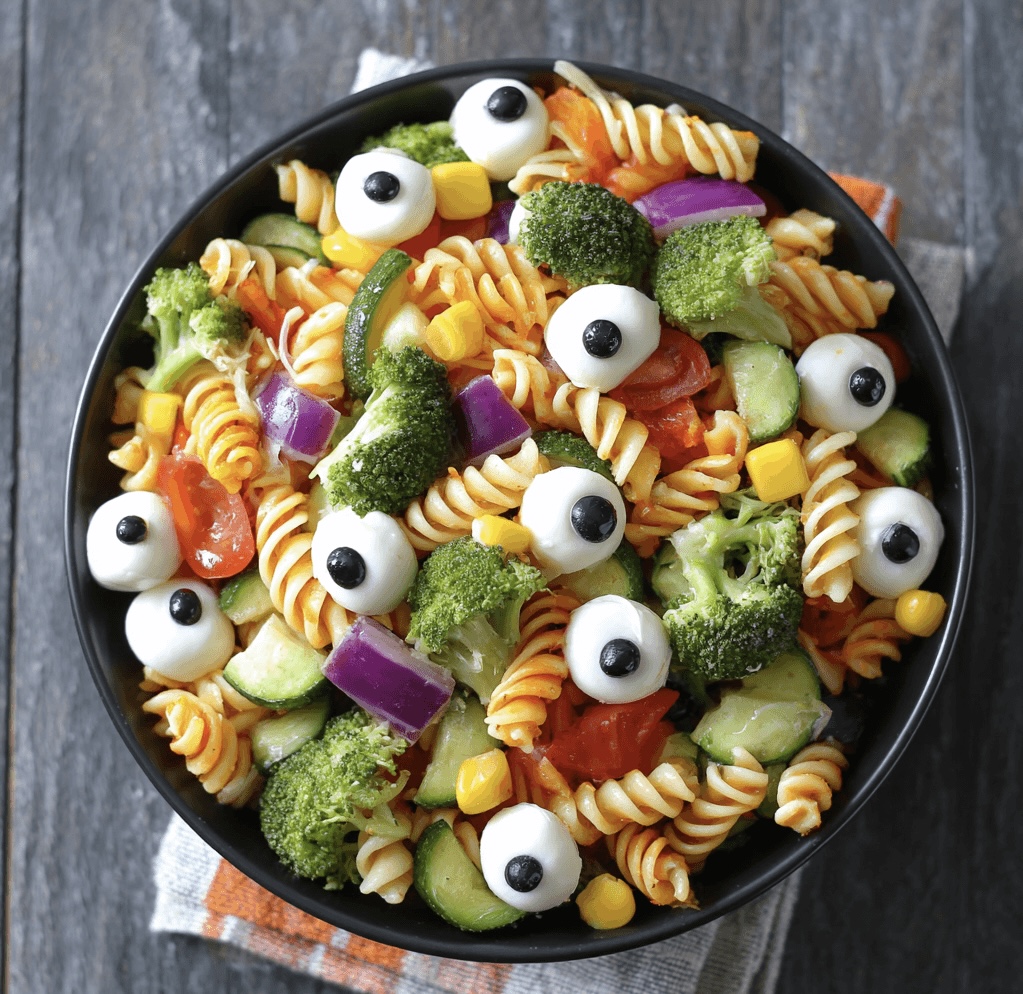
Eyeball Pasta Salad is a fun and spooky dish perfect for Halloween parties, themed gatherings, or any occasion where you want to impress your guests with a creepy yet delicious treat! This salad features colorful pasta, fresh vegetables, and mozzarella “eyeballs” that add a playful twist.
Ingredients List
For the Pasta Salad:
- 8 oz (about 2 cups) rotini or fusilli pasta
- 1 cup cherry tomatoes, halved
- 1 cup cucumber, diced
- 1 cup bell peppers (red, yellow, or green), diced
- 1 cup black olives, sliced
- ½ cup red onion, finely chopped
- ½ cup fresh parsley, chopped
For the Eyeballs:
- 1 cup mini mozzarella balls (bocconcini)
- ½ cup black olives, sliced (for pupils)
- Fresh basil leaves (optional, for garnish)
For the Dressing:
- ½ cup olive oil
- ¼ cup red wine vinegar
- 1 teaspoon garlic powder
- 1 teaspoon Italian seasoning
- Salt and pepper to taste
Timing
Preparing Eyeball Pasta Salad takes about 20 minutes of prep time and 10 minutes of cooking time. Total time is approximately 30 minutes.
Step-by-Step Instructions
Step 1: Cook the Pasta
- Boil Water: In a large pot, bring salted water to a boil.
- Cook Pasta: Add the pasta and cook according to package instructions until al dente. Drain and rinse under cold water to cool.
Step 2: Prepare the Dressing
- Mix Dressing: In a small bowl, whisk together the olive oil, red wine vinegar, garlic powder, Italian seasoning, salt, and pepper. Set aside.
Step 3: Assemble the Salad
- Combine Ingredients: In a large mixing bowl, combine the cooked pasta, cherry tomatoes, cucumber, bell peppers, black olives, red onion, and parsley.
- Add Dressing: Pour the dressing over the pasta salad and toss to coat evenly.
Step 4: Make the Eyeballs
- Prepare Mozzarella Balls: Take the mini mozzarella balls and place them on a serving platter.
- Add Pupils: Top each mozzarella ball with a slice of black olive to create the “pupil” of the eyeball.
Step 5: Serve
- Plate the Salad: Transfer the pasta salad to a serving bowl or platter.
- Garnish: Arrange the mozzarella eyeballs on top of the pasta salad. Optionally, add fresh basil leaves for a pop of color.
- Chill: For best flavor, let the salad chill in the refrigerator for about 30 minutes before serving.
Nutritional Information
Here’s a quick glance at the nutritional profile of Eyeball Pasta Salad (per serving, assuming 8 servings):
| Nutrient | Amount per Serving |
|---|---|
| Calories | 250 |
| Protein | 8g |
| Fat | 15g |
| Carbohydrates | 24g |
| Fiber | 3g |
Tips for Customization
- Add Protein: Include cooked chicken, shrimp, or chickpeas for added protein.
- Use Different Vegetables: Feel free to incorporate other vegetables like carrots, peas, or corn based on your preference.
- Cheese Variations: Swap mozzarella for feta or goat cheese for a different flavor.
Serving Suggestions
Eyeball Pasta Salad pairs well with:
- Garlic bread or breadsticks.
- A side of spooky Halloween-themed snacks.
- A refreshing beverage like lemonade or iced tea.
Common Mistakes to Avoid
- Overcooking the Pasta: Make sure to cook the pasta al dente to prevent it from becoming mushy.
- Skipping the Rinse: Rinsing the pasta under cold water helps stop the cooking process and cools it down for the salad.
- Not Chilling the Salad: Allowing the salad to chill enhances the flavors and makes it more refreshing.
Storing Tips for the Recipe
Eyeball Pasta Salad can be stored in an airtight container in the refrigerator for up to 3 days. The flavors will continue to meld, making it even tastier!
Conclusion
In about 30 minutes, you can whip up a spooky and delicious Eyeball Pasta Salad that’s sure to be a hit at your next gathering. With its fun presentation and tasty ingredients, it’s a perfect addition to any Halloween feast!
FAQs
Can I make this salad ahead of time?
Yes! You can prepare the pasta salad a day in advance and store it in the refrigerator. Just add the mozzarella eyeballs right before serving.
Can I use different types of pasta?
Absolutely! Feel free to use any pasta shape you prefer, such as penne, farfalle, or even gluten-free pasta.
What can I do if I have leftovers?
Store any leftover pasta salad in an airtight container in the refrigerator for up to 3 days.
Can I customize the recipe?
Definitely! You can add your favorite vegetables, proteins, or even different dressings to suit your taste.

Eyeball Pasta Salad Recipe
Ingredients
- For the Pasta Salad:
- • 8 oz (about 2 cups) rotini or fusilli pasta
- • 1 cup cherry tomatoes, halved
- • 1 cup cucumber, diced
- • 1 cup bell peppers (red, yellow, or green), diced
- • 1 cup black olives, sliced
- • ½ cup red onion, finely chopped
- • ½ cup fresh parsley, chopped
- For the Eyeballs:
- • 1 cup mini mozzarella balls (bocconcini)
- • ½ cup black olives, sliced (for pupils)
- • Fresh basil leaves (optional, for garnish)
- For the Dressing:
- • ½ cup olive oil
- • ¼ cup red wine vinegar
- • 1 teaspoon garlic powder
- • 1 teaspoon Italian seasoning
- • Salt and pepper to taste
Instructions
- Cook the Pasta
- Bring salted water to a boil in a large pot.
- Add pasta and cook according to package directions until al dente.
- Drain and rinse under cold water to cool.
- Prepare the Dressing
- In a small bowl, whisk together olive oil, red wine vinegar, garlic powder, Italian seasoning, salt, and pepper.
- Assemble the Salad
- In a large bowl, combine the cooked pasta, cherry tomatoes, cucumber, bell peppers, black olives, red onion, and parsley.
- Pour the dressing over and toss to coat evenly.
- Make the Eyeballs
- Place the mini mozzarella balls on a plate.
- Top each with a slice of black olive to create the “pupil.”
- Serve
- Transfer the pasta salad to a serving dish.
- Arrange the mozzarella “eyeballs” on top and garnish with basil leaves if desired.
- Chill in the refrigerator for about 30 minutes before serving.
Did you make this recipe?
Please leave a comment on the blog or share a photo on Facebook


