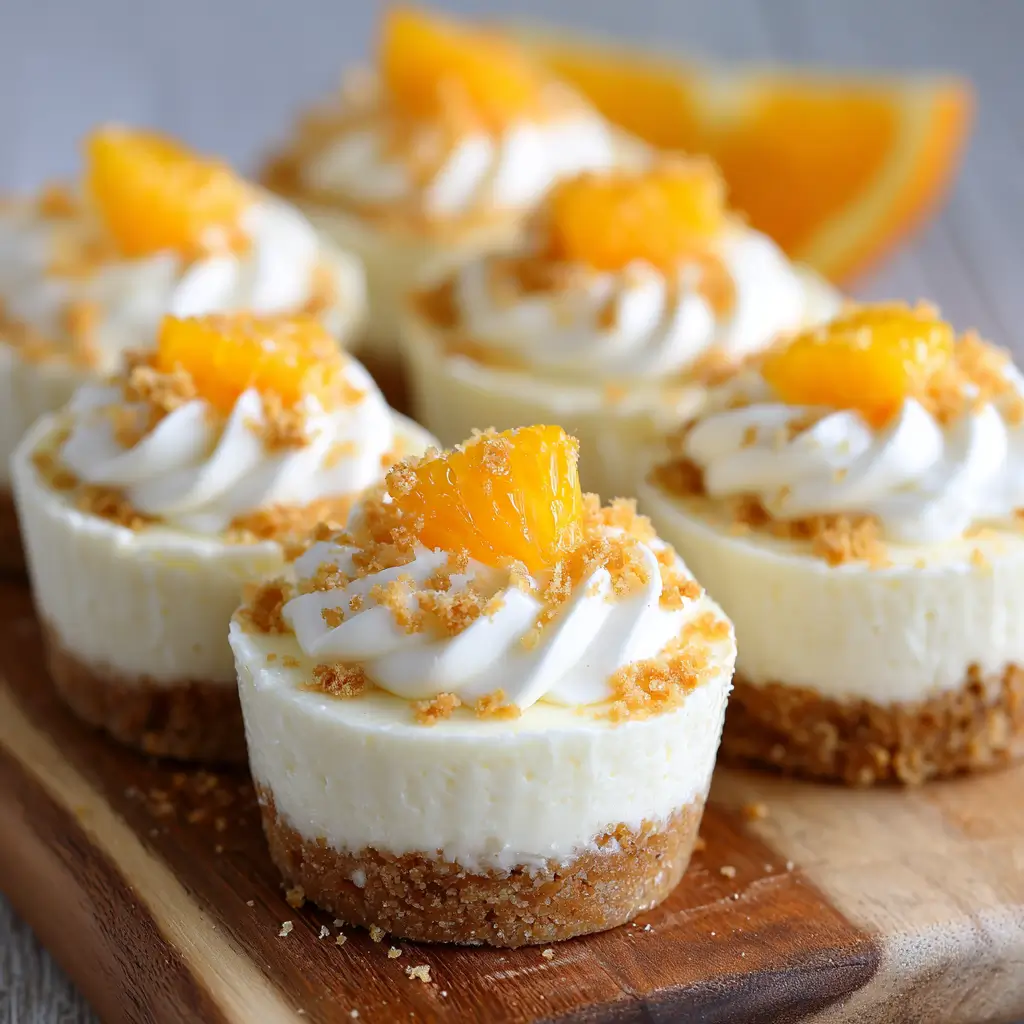
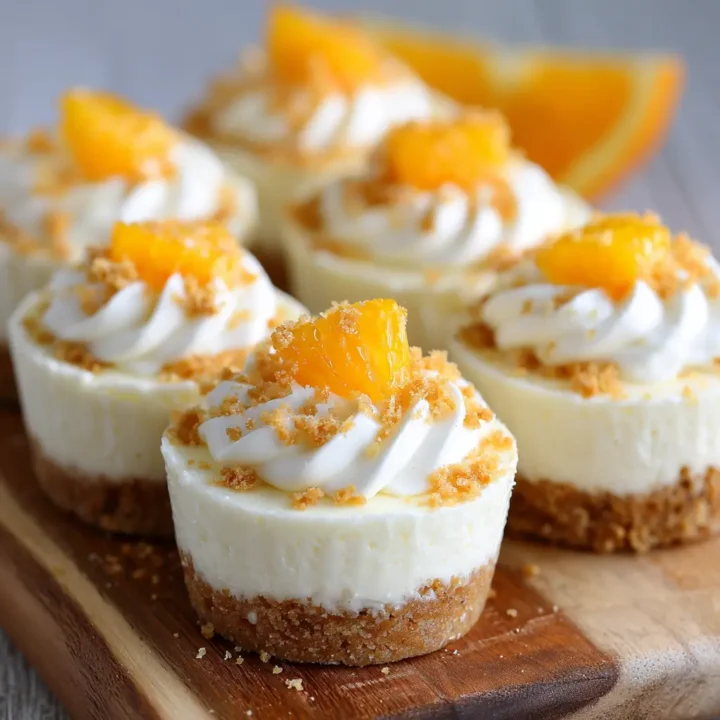
Are you searching for a dessert that is both easy to make and impressively delicious? Look no further than No-Bake Mini Orange Cheesecakes! These delightful treats combine the creamy richness of cheesecake with the bright, zesty flavor of orange, making them the perfect choice for any occasion. In this blog post, we will guide you through the steps to create these mini cheesecakes, explore their ingredients, and share tips to make them a standout dessert at your next gathering.
Ingredients List
To create these No-Bake Mini Orange Cheesecakes, gather the following ingredients:
- Cream cheese (8 ounces, softened): The base of your cheesecake, providing a rich and creamy texture.
- Granulated sugar (1/3 cup): Sweetens the cheesecake filling, balancing the tanginess of the cream cheese.
- Whipped cream (1 cup, heavy cream): Adds lightness and fluffiness to the cheesecake.
- Orange zest (1 tablespoon): Infuses the cheesecake with a vibrant citrus flavor.
- Fresh orange juice (1/4 cup): Enhances the orange flavor and adds moisture.
- Graham cracker crumbs (1 cup): Forms the crust, providing a crunchy texture.
- Butter (4 tablespoons, melted): Binds the graham cracker crumbs together for a delicious crust.
- Pinch of salt: Enhances sweetness and balances flavors.
Substitutions:
- Cream cheese: Use mascarpone or a dairy-free cream cheese alternative for a different flavor profile or dietary needs.
- Granulated sugar: Substitute with honey or agave syrup for a natural sweetener.
- Whipped cream: Use coconut cream for a dairy-free version.
Step-by-Step Instructions
Step 1: Prepare the Crust
- In a mixing bowl, combine the graham cracker crumbs, melted butter, and a pinch of salt.
- Mix until the crumbs are fully coated with butter.
- Press the mixture firmly into the bottom of mini cheesecake cups or a muffin tin lined with cupcake liners. Use the back of a spoon to ensure an even layer.
Step 2: Make the Cheesecake Filling
- In a large mixing bowl, beat the softened cream cheese and granulated sugar together until smooth and creamy.
- Add the orange zest and fresh orange juice, mixing until well combined.
- In a separate bowl, whip the heavy cream until stiff peaks form.
- Gently fold the whipped cream into the cream cheese mixture, being careful not to deflate the whipped cream.
Step 3: Assemble the Cheesecakes
- Spoon the cheesecake filling over the prepared crusts, filling each cup to the top.
- Smooth the tops with a spatula or the back of a spoon.
Step 4: Chill the Cheesecakes
- Cover the cheesecakes with plastic wrap and refrigerate for at least 4 hours, or overnight for the best texture and flavor.
Step 5: Serve and Enjoy
- Once chilled, remove the cheesecakes from the refrigerator.
- Garnish with additional orange zest or a slice of orange on top before serving.
Nutritional Information
Here’s a breakdown of the nutritional content per mini cheesecake (based on 12 servings):
| Nutrient | Amount |
|---|---|
| Calories | 180 |
| Protein | 3g |
| Carbohydrates | 22g |
| Fat | 9g |
| Saturated Fat | 5g |
| Sugar | 10g |
These mini cheesecakes offer a delightful balance of flavors while being a satisfying treat.
Healthier Alternatives for the Recipe
If you’re looking to make these No-Bake Mini Orange Cheesecakes a bit healthier, consider these alternatives:
- Use low-fat cream cheese: This can reduce the overall calorie count while still providing a creamy texture.
- Add Greek yogurt: Incorporate Greek yogurt for added protein and a tangy flavor that complements the orange.
- Reduce sugar: Cut down on granulated sugar or use a sugar substitute like stevia or monk fruit sweetener.
These modifications can help maintain the dessert’s deliciousness while catering to various dietary needs.
Serving Suggestions
To enhance your No-Bake Mini Orange Cheesecakes presentation, try these creative serving suggestions:
- Garnish with fresh mint leaves: A sprig of mint adds a pop of color and freshness.
- Serve with a fruit compote: A spoonful of berry or citrus compote on top adds an extra layer of flavor.
- Pair with a citrus sorbet: A scoop of lemon or orange sorbet can complement the flavors beautifully.
Common Mistakes to Avoid
When making No-Bake Mini Orange Cheesecakes, be mindful of these common pitfalls:
- Not softening the cream cheese: Ensure the cream cheese is softened to room temperature for a smooth filling.
- Overmixing the whipped cream: Be careful not to overmix the whipped cream, as it can become grainy.
- Insufficient chilling time: Allowing the cheesecakes to chill properly is crucial for achieving the right texture.
Storing Tips for the Recipe
To keep your No-Bake Mini Orange Cheesecakes fresh:
- Refrigerate leftovers: Store in an airtight container in the refrigerator for up to 3 days.
- Avoid freezing: Freezing may change the texture, so it’s best enjoyed fresh.
- Prep ahead: You can make the cheesecakes a day in advance to save time on the day of serving.
Conclusion
The No-Bake Mini Orange Cheesecakes are a refreshing and delightful dessert that combines creamy cheesecake with bright citrus flavors. With simple ingredients and easy steps, you can create a stunning treat that will impress your guests. Try this recipe today, and don’t forget to share your experience in the comments below! Your feedback is invaluable, and I’d love to hear how your mini cheesecakes turned out!
No-Bake Mini Orange Cheesecakes
Ingredients
- Cream cheese (8 ounces, softened): The base of your cheesecake, providing a rich and creamy texture.
- Granulated sugar (1/3 cup): Sweetens the cheesecake filling, balancing the tanginess of the cream cheese.
- Whipped cream (1 cup, heavy cream): Adds lightness and fluffiness to the cheesecake.
- Orange zest (1 tablespoon): Infuses the cheesecake with a vibrant citrus flavor.
- Fresh orange juice (1/4 cup): Enhances the orange flavor and adds moisture.
- Graham cracker crumbs (1 cup): Forms the crust, providing a crunchy texture.
- Butter (4 tablespoons, melted): Binds the graham cracker crumbs together for a delicious crust.
- Pinch of salt: Enhances sweetness and balances flavors.
- Substitutions:
- Cream cheese: Use mascarpone or a dairy-free cream cheese alternative for a different flavor profile or dietary needs.
- Granulated sugar: Substitute with honey or agave syrup for a natural sweetener.
- Whipped cream: Use coconut cream for a dairy-free version.
Instructions
Step 1: Prepare the Crust
- In a mixing bowl, combine the graham cracker crumbs, melted butter, and a pinch of salt.
- Mix until the crumbs are fully coated with butter.
- Press the mixture firmly into the bottom of mini cheesecake cups or a muffin tin lined with cupcake liners. Use the back of a spoon to ensure an even layer.
Step 2: Make the Cheesecake Filling
- In a large mixing bowl, beat the softened cream cheese and granulated sugar together until smooth and creamy.
- Add the orange zest and fresh orange juice, mixing until well combined.
- In a separate bowl, whip the heavy cream until stiff peaks form.
- Gently fold the whipped cream into the cream cheese mixture, being careful not to deflate the whipped cream.
Step 3: Assemble the Cheesecakes
- Spoon the cheesecake filling over the prepared crusts, filling each cup to the top.
- Smooth the tops with a spatula or the back of a spoon.
Step 4: Chill the Cheesecakes
- Cover the cheesecakes with plastic wrap and refrigerate for at least 4 hours, or overnight for the best texture and flavor.
Step 5: Serve and Enjoy
- Once chilled, remove the cheesecakes from the refrigerator.
- Garnish with additional orange zest or a slice of orange on top before serving.